Tuesday, August 31, 2021

SOS 453: Summer Lovin'

If you've already guessed that this fortnight's challenge at Shopping Our Stash is to bid August a fond farewell by making one more card that celebrates the delights of summer, then we're ahead of the game and I can get right to showing off my card:


This might be a record for sticker usage on one card, lol... even for ME! And arguably it's a bit overcrowded, but that kind of sums up the season, doesn't it? Lots of fun activities, sunny weather and tasty treats, all crammed into three short months. Most of the product here is ancient, and quite a bit is Echo Park (they are really good at seasonal collections, imo!). There are one or two Doodlebug elements, a little Carta Bella and even some Pebbles. Oh and I had to add an Eyelet Outlet Sunglass Brad over top of the printed one on the journal card, obviously!

Be sure to mosey on over to SOS to see what the other design team darlings have made to inspire YOU! ♥

Sunday, August 29, 2021

Getting Inky

Thanks to this fabulous video on Wendy Vecchi's Instagram feed, I was inspired to use my Ranger Archival Reinkers in Wendy's newest shades (Periwinkle, Goldenrod and English Ivy) to make some beautifully serendipitous backgrounds. 


Since Archival Inks are permanent, you need to dilute the very intense colors of the reinkers with rubbing alcohol, rather than water. Wendy recommends the 90% variety, but it turned out that what I had was 70%, and it worked pretty well. When I was done dipping and mixing and swirling the colors around on my craft mat (each background needed a few layers to get really interesting) I added some of the older colors (Garden Patina, Cactus Flower and Sunflower) by smooshing my ink pads; then I got to the stamping, stenciling and even a little bit of doodling!

The motifs I used on my three panels were: the repeating circle stencil and solid flourish stamp from Wendy's Thank You Stamp, Die and Stencil Set; the heart, triple dot and Merci stamps, as well as the flower dot and heart stencils, plus the label-shaped die from Merci and More; and the two star stamps from the Birthday Bash set. I outlined some of the designs with a fine black pen and added extra details with a white paint marker.


There's only one problem: Now that I've started making backgrounds with reinkers, I really don't want to stop! If you need me, I'll be at my worktable... ♥

Friday, August 27, 2021

Cute Cookie Inspiration

It's a photo inspiration challenge this fortnight at Jingle Belles, and we've taken our cue from these sweet (in every sense, lol) snow globe cookie creations from  Missy's Sugar Shop on Etsy.*

You can use as many (or as few!) elements as you'd like from the inspiration pic. Maybe you'll just use the color palette, or perhaps you'll incorporate the cute characters, or add a snow globe. It's entirely up to you, just make sure you tell us in your post what inspired your design.

I adore the bright non-traditional color palette, as well as the adorable critters and characters. I used multiple shades of my go-to Bella Besties Dot and Graph papers (from Paper Anthology) to mimic the snowy background and some older Doodlebug stickers in the starring roles. I also love how much texture the icing gives to the cookies, which I've interpreted in the form of machine stitching and Eyelet Outlet Multi Size Pearl Bling accents.

Be sure to visit Jingle Belles to see Stephanie's clever and appealing card; then start planning what you'll link up with us this time!

*Missy's Sugar Shop is packed full of adorable inspiration; I highly recommend taking a little scroll through all the colors, shapes and themes!  

Thursday, August 26, 2021

Going Round in Circles

Sometimes, going round in circles is a good thing, especially if the circles in question are tiny vellum circle stickers from Eagle Japan, which can be found at The Ink Pad. Hop over to TIP Blog for the full story!

Wednesday, August 25, 2021

Coffee Bean Balloons??!?!?

Here is a card that's 100% inspired by Sarah Galli Jimenez, who posted two brilliant coffee bean balloon cards in our Eyelet Outlet Fan Group on Facebook and I loved them so much, I had to try to make my own slimline version! 

I arranged (but didn't attach) the balloon bouquet of Coffee Bean Brads, mixed with Heart Brads in white and pink, so that I could lightly pencil in the balloon strings and machine stitch over them, before affixing the brads. I stamped and colored Riley and Co's Midge with Coffee (in Ground Espresso Distress Archival, obviously!) and added a Coffee Cup Brad over the mug that's in the original image; the sentiment is from Wendy Vecchi's Birthday Bash Stamp, Stencil and Die set. Finally, I made a super-fun background paper by lining up strips of Eyelet Outlet Donut Tape on plain white cardstock and used it to frame up the panel.


I love this idea so much that now I'm wondering if there are more brads I could make into balloons too?! Stay tuned to see what I come up with in future! Meanwhile, thank you, Sarah Galli Jimenez for sharing this wonderful idea with us!

Tuesday, August 24, 2021

To Swatch or Not to Swatch...

...that is the question! I find ink and paint swatches exceedingly helpful when I'm working on creative projects, so I decided to celebrate Ranger's three beautiful new Wendy Vecchi Archival Ink colors (Goldenrod, Periwinkle and English Ivy) by making a little ring-bound book of all my Wendy Vecchi colors.


When making swatches of any line that's likely to add more colors, I highly recommend building in a bit of variety; so you don't have to be too worried about future swatches not looking exactly the same if you can't find the image you used the first time. 


I trimmed offcuts of sturdy watercolor paper into 3" squares, and used several different combos from Wendy's "Thank You" and "Bravo" Stamp, Die and Stencil Sets. I deliberately didn't spend much time lining up the images precisely, because odds are I'll spill, smudge or tear a few of them down the line, and life's too short to have to remake swatches!


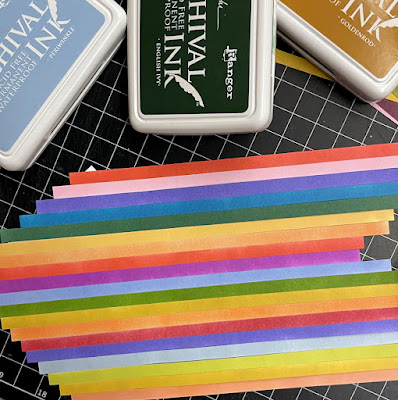
I made a 3.25" square cover from squares of black chipboard and decided to create a rainbow with the inks to decorate it.


I applied all the shades to white cardstock in about a 3/8" patch, then trimmed each color down into 1/4" strips. I applied the strips to another piece of cardstock which I had run through my Xyron adhesive machine. When all the colors were lined up, I cut the rainbow panel into four 3" squares, which I affixed to the outside and inside of the front and back covers.


I used a simple ring binding to hold the swatches together so that when I add more colors to my collection, it'll be easy to put them in rainbow order inside the book.


Now that all of my swatches are neatly stacked inside their book, I feel like I need to get a few more Wendy Vecchi Archival Inks!

Saturday, August 21, 2021

Cheering for You

It's a three-fer of colorful circle motif cards, featuring the newest additions to Wendy Vecchi's Signature Series Archival Inks from Ranger: Periwinkle, Goldenrod and English Ivy.

The other day I suddenly had an idea about a CAS card (which... if you know me... will surprise you, lol!) in which I'd stamp the pretty floral elements from Wendy's "Bravo" Stamp, Die and Stencil Set over variously sized circles of those three lovely shades. Then I'd add a sentiment (from the same set) and use my Perfect Stylus Set to scatter an accent of Periwinkle Liquid Pearls. As it turned out, I used that idea three different ways, and the resulting cards got less CAS (shocker!) as I went along.

My circle "stencil" is just three sizes of ancient circle punches, on a piece of glossy cardstock; but nevertheless the Mini Make Art STAY-tion's four magnets held it perfectly in place while I added my colors.

I found that I could mat the finished panels on nearly every shade of purple, green, blue or yellow in my cardstock collection, as long as they were slightly muted. Unusually for me, I did nearly all of my stamping on a single surface, except for the sentiment on the last card, which I made into a little flag.

I really like all three versions, and I'm not sure there's any combination of Periwinkle, Goldenrod and English Ivy that wouldn't look pretty flippin' cool; but if you realllllllly pushed me to choose, I'd probably confess that the one with the graph paper is my favorite.

Friday, August 20, 2021

Cardstock Christmas (the long way 'round!)

Presenting the absolutely slowest and least efficient way to comply with this fortnight's Jingle Belles ban on commercial patterned paper. Unless... you really, reallllllllly feel like doodling at a time when what you actually need to do is make a holiday card. 

As a matter of fact, one of the things I especially love doodling is snowflakes, although irl, they never turn out to be classically elegant like the ones I imagine, they're usually a bit wonky, as you can see! I drew all of the basic shapes on Strathmore Watercolor Paper with my thinnest Pitt Artist Pen (XS= extra superfine, it's .1mm); then smooshed Cerulean and Violet ColorBurst on top. When the panel was absolutely bone dry... (if you use a heatgun, be sure to dry the back as well as the front; watercolor paper has long fibers and the core of the paper can still be damp!) ...I added details with a slightly heavier Pitt (.3mm) and with a few sizes of white Posca Pen. To finish the whole thing, I selectively painted on Frosted Lace Stickles and added Hero Arts Enamel Dots in several sizes and shades of aqua, before machine stitching the panel to a mat of divine white Non-Shed Glitter Paper from Paper Anthology, a larger mat of dark teal cardstock, and a white A9 card.


Visit Jingle Belles to see Stephanie's beautiful Cardstock Christmas Card and link up your own beautiful creation!

Thursday, August 19, 2021

Deckled Rainbows

Whenever I'm not sure what color to choose, I go with my all-time favorite... RAINBOW! In this case, I got a headstart from The Papercut's Poptone Variety Slimline Card Assortment, which has twenty-eight perfectly scored slimline cards in fourteen gorgeous colors; and used Tim Holtz's Deckle Torn Edge Trimmer from Tonic to make my own geometric rainbow patterns. Read all about it on The Ink Pad Blog.

Wednesday, August 18, 2021

Summer Vibes

Summer in New Jersey can be pretty hot and very humid, but it's still my favorite season, and here's a card that celebrates some of my favorite summer treats, in Eyelet Outlet Brad form! 

I used a favorite set of bold Dina Wakley Alpha Stencils from The Ink Pad and six sizzling shades of Ranger Distress Ink (Worn Lipstick, Mermaid Lagoon, Spiced Marmalade, Tumbled Glass, Mustard Seed and Twisted Citron to be precise) to write the word, "Summer" across my slimline-sized panel. I matted the whole thing on a piece of white cardstock covered in strips of Color Wheel Washi, then added a nice selection of brads, including: Beach Umbrella, Flip Flop Brads, Mini Ladybug, Cocktail Brads, Mini Emotion, Tall Palm, Sandcastle, Flamingo, Colored Daisy Brads, Mini Bees, Ice Cream, Sun and Pastel Sunglass Brads. I hope whatever your favorite Summer Vibes might be, that you'll enjoy a few of them today!

Tuesday, August 17, 2021

If You Are...

...a very, very lucky papercrafter, one day you might just find a package of amazing Wendy Veccchi goodies on your doorstep, courtesy of Ranger Ink, and you'd probably do a bit of a Happy Dance. Especially if there were three of Wendy's brand new signature Archival Ink colors, a Mini Make Art STAY-tion, beautiful Stamp, Die and Stencil Sets, Liquid Pearls, a Perfect Stylus Set and more!


I'm pretty sure you'd tear right into the Thank You Stamp Die and Stencil Set, knowing that the flowers and leaves would look outstanding in Goldenrod and English Ivy Archival, and adding highlights of Periwinkle to your collage background would really make the flowers pop. Being that Archival Ink is permanent, you might even use it to stain some drywall tape to match!


If, at some point, you decided to add some hand-stitching, you'd probably be pretty excited to find that DMC Floss #3838, #676 and #895 would be excellent matches for Periwinkle, Goldenrod and English Ivy, respectively. You might add a nice chunky border of Periwinkle stitches to celebrate.


It would be so easy to add some gorgeous blooms on top of that vintage paper collage, since you could use the Make Art STAY-tion to anchor the stencil while you laid down some perfectly-flower-shaped Goldenrod ink, stamp the outline on top, and cut out with the coordinating die from the Thank You Set. And then the ideal sentiment would be right there for you, as well.


After all that, you'd no doubt want to finish blogging as quickly as possible... so you could go back and make something else! ♥   

Wood You Believe...?

The new challenge at Shopping Our Stash is to use wooden items or woodgrain papers in your project. Since I tend to collect woodgrain papers in every imaginable size, shape and color, I was spoilt for choice!


This card was built backwards, in the sense that I started with the two beautiful butterflies and the tiny paper flowers; both leftovers from Prima's Georgia Blues collection a few years back. When I looked for papers to coordinate, I found a small hoard of Blue Fern Studios' Eclectic Charm collection, which we had at Paper Anthology about two years ago, with which I was (still am!) utterly smitten. Finally, I chose a  woodgrain background to match, in the form of weathered boards on a Crate Paper sheet that I bought for this woodgrain b-side, rather than the colorful print that was on top. Not until I went to photograph the card did I realize those tiny Prima flowers have super-small wooden beads at their centers, as well!


Be sure to visit SOS to see what my fellow design team darlings have made, especially to inspire YOU! ♥

Sunday, August 15, 2021

New Class: Birthday Bash


Join Me at Paper Anthology for Birthday Bash, my first IN-PERSON class in over a year!
 
We'll make four festive, colorful, birthday greetings, suitable for nearly everybody on your list! Birthday themed papers and embellies from Fun Stampers Journey combined with dies by Spellbinders, Stampendous and Concord & 9th. This class will be a little stamping, a little coloring and A LOT of fun. 

Visit the Paper Anthology Blog for dates, times and sign-up details.

Friday, August 13, 2021

Cardstock Christmas

Yikes! This fortnight at Jingle Belles we're proving that we don't just "stack the deck" with our favorite techniques; sometimes we challenge ourselves, too! Apart from the dreaded one layer CAS card, I find making cards without patterned paper to be about the most difficult, so of course that's what we're doing this time. You can stamp, stencil, diecut, paint, watercolor, doodle, emboss, gel print or embark on any other technique you'd like, but you cannot use ANY commercial patterned paper. (Did I already say, "yikes"?! I think I did...

Luckily, I remembered a technique I did years ago, layering lots of torn cardstock pieces and then diecutting with one of my oldest xmas tree dies, so that was my first port of call. I diecut the reindeer from some thin wood veneer and, for the first time in about six months, remembered that I have embossing folders, yay! I used an ancient snowy e/f on some Core'dinations cardstock, then sanded it lightly to let the darker blue core show up better. Glitter paper snow, Eyelet Outlet Pearl accents and an embossed dotted blue cardstock mat complete my texture-centric design.

Head on over to Jingle Belles to see what Stephanie (who is much less designer-paper-addicted than I am!) has done with this challenging prompt!

Thursday, August 12, 2021

Prize Ribbon *IS* a Winner!

Of course any new Ranger Distress color is a cause for celebration, but the newest shade, Prize Ribbon, is a deep, vibrant blue that blends exceptionally well with many other colors from the line. When I get a new Distress Oxide, the first thing I do is make a bunch of ATC-sized panels and experiment with lots of different blends. I highly recommend this sort of experimental play for devising interesting pairings. Be sure to make note of the colors on the back of your ATCs as you work, so you can easily recreate your faves! Hop over to The Ink Pad Blog to see the first card I made with Prize Ribbon!

Wednesday, August 11, 2021

Let's Make Tape Squares

I never get tired of playing with my Eyelet Outlet Washi collection, and I love to come up with new ideas. This birthday card has background made entirely of Chevron Tape strips, which is so fun and colorful that it only needed a few brads... (a Party Hat, a Birthday Sock Monkey and a Birthday Cake, to be precise) ...plus some sequins to finish it off!


Here's how I made that quilt-like background; note that I switched to Pencil Tape for the second sample. I neatly applied strips of tape to plain white cardstock, cut them apart with my guillotine trimmer, then cut the lengths so they were all exactly the same size, in this case, about 3". I affixed them to another piece of plain cardstock, starting at the center and working outward, as you can see in the photos below. 

To answer the obvious question: Yes, you could apply strips of tape directly to your background and skip the step of backing them with cardstock; but I found it hard to get the cuts on the short ends absolutely straight, and also it was more challenging to line them up precisely.  


When all the strips were applied to the background, I trimmed up the ends and matted the whole panel on some red cardstock, added a Paper Flower stack and a Heart Brad and called it good to go!


Now I want to try this with ALL of my EO Tapes, including the wide ones, the skinny ones and the glitter ones!

Friday, August 6, 2021

Walkin' in a Washi Wonderland!

A red and green washi wonderland, that is; since we are still celebrating those traditional Christmas colors at Jingle Belles! This week I was so inspired, I made two (admittedly quite similar) cards. See?

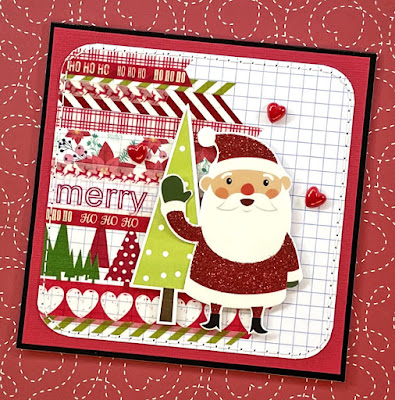
I broke out all of my favorite Eyelet Outlet holiday tape styles that were red or green or both and lined them up on my graph paper backgrounds. By the way, the graph paper was a very deliberate choice; if I'm going to apply lots of tape, or alphabet stickers, or anything else that looks better straight, I like to use a background that has strong horizontal lines to make things easier!


Once all my tapes were affixed, I stitched around the edges for a little extra texture. Then I added little clusters of holiday stickers and diecuts, not to mention a few EO Brads and some Heart Pearls; plus a red mat and a black glossy card et voila!


Hop over to Jingle Belles to see Stephanie's beautiful card and then start planning what you'll make using (mostly) red and green!

Thursday, August 5, 2021

Deckle-Edge Paper Weaving

Tim Holtz's Deckle Torn Edge Trimmer has sold out every time we've had it in stock at The Ink Pad, so of course I had to try one for myself. In the course of using it to make larger cuts, I became fascinated by the narrow deckle-edged off-cut strips, which I thought would be very cool woven together! You can read more about this technique on The Ink Pad Blog.

Wednesday, August 4, 2021

Make a Wish

If, by any chance, your wish was for beautiful, realistic Dragonfly Brads, it has been granted by Eyelet Outlet! I cannot tell a lie, I'm in love with these, so you'll be seeing a lot of them! 


Coincidentally, I had just purchased P13's Stitched With Love collection at Paper Anthology. Since it was still sitting on my worktable when I sat down to make my Dragonfly card, it was hard to ignore the fact that these items could have been made especially to go together!


I stamped my sentiment in a rich brown on one of the embroidery hoops from the patterned paper, then carefully cut it out and added three Dragonfly Brads. I made a background of two papers divided by a frieze of flowers from a third, framed up with Purple Checked Washi. I accents a few additional sprays of flowers with Glitter Enamel Dots (there are eleven other colors if you don't love gold!) and called it a day.


Be sure to check up on the EO Blog often, to see what the design team have been up to, it is always worth the trip!

Tuesday, August 3, 2021

SOS Sketchfest

This fortnight at Shopping Our Stash we invite you to choose from one of four excellent and inspiring sketches by Craft with Sarah and make a card based on the sketch you choose. I went with sketch 001, which I will show you in a minute, but first, here's my card:


For once in my life, I've done a very straight-up, literal version of the sketch, though admittedly my pennants are different lengths, but that's what happens when you're using up scraps. They're scraps from some of my favorite Prima collections of the last few years though, so they're mostly pink and floral because that's the way I roll! My left hand strip is White Lace Tape from The Ink Pad which has gone out of stock, but that doesn't mean I love it any less.


I swapped out the three small circles around the large circle in favor of a fussy-cut butterfly and two ancient, tiny, Prima flowers. I added lots and lots of Eyelet Outlet Pearls because those are ALWAYS a good idea, imo!


Hop over to SOS to see the other designers cards, then visit Craft with Sarah to see the four sketches you can choose from!

Sunday, August 1, 2021

ICAD 2021 Wrap-Up!

Every Index Card a Day season lasts exactly sixty-one days (from June 1st to July 31st) so it's ridiculous to say this was the fastest ICAD ever; but nevertheless it definitely felt much faster than usual! Here's my final round up of cards for ICAD2021. If for any reason (severe insomnia?) you need to see ALL the cards, you can click this link.


day 54: off prompt doodles
i saw a similar idea on instagram... layered pages of doodles and leaves, with little patterns and intricate edges. i wish i had bookmarked it so i could send you off to see it! 


day 55: off prompt collage
on this night i realized at about 11:30pm that i had not posted my ICAD; then shortly after, i realized that i hadn't MADE it, either! this might be the fastest collage EVERRRRRR!


day 56: dot mandala monday
conversely, i made this dot mandala around week two, shoved it into my book, and forgot all about it!


day 57: off prompt rainbow
yep... right up to the end i'm into hand cut patterns with stitching on top.


day 58: off prompt
this idea is sooooooooo much cooler inside my head, and at some point i hope i'll manage to translate that coolness onto a sketchbook page or card, because this definitely isn't it. but there are times you need to make the wrong thing (or a few wrong things) before you can figure out why it's wrong, and then (if you're lucky) how to make it right. all part of the process!


day 59: pocket
i made a slightly smaller than usual library pocket (with my score-board) and then trimmed down --and collaged-- a swedish library card to fit.


day 60: off prompt
this was going to be a much more traditional/pretty hawaiiana/floral type collage; but then i found this adorable island-dwelling malolo (flying fish) and changed course.


day 61: forward
i really couldn't move forward into "civilian" life without saying a huuuuuge THANK YOU to tammy garcia and the instagram ICAD community. thanks also to anyone who's been reading these posts, i've loved every minute of ICAD2021 and am already looking forward to june 1, 2022!

♥♥♥