Saturday, March 31, 2018

more gel printing, anyone?

be a sport and say, "yes" ok... otherwise the whole rest of this post falls really flat. thanks! here ya go:

day 16: feathers
i used some cool 7gypsies acrylic feathers as masks and some pretty large real feathers to "stamp" with. i'm just going to skip over the part where i tried to use small feathers as masks, got them hopelessly entangled and spent a really long time picking all the wet, painty, broken feathery bits off my brayer.

day 17: letters 
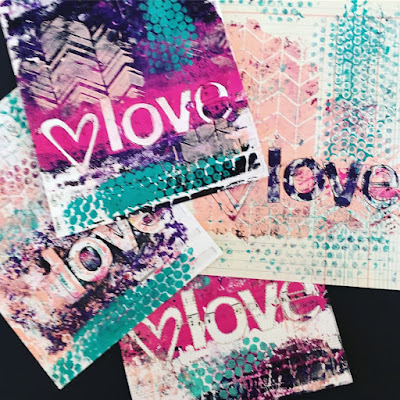
i placed some ancient heidi swapp acrylic letters BACKWARDS on my gel plate as masks, then printed around them using the colors from color crush creative palette #39: happy dance

day 18: numerals
i altered a book and called it, "#31 days of gel printing" and you can see more of it in this post!

day 19: book paper
the background pattern is a stencil coated with clear gesso and rainbow shades of colorburst. the mandala is a rejected panel from my "emboss like a boss" class samples which really has nothing to do with gel printing, but it featured many of the same colorburst shades and looked really nice with the background, so i added it.

day 20: black and blue
this happened to fall the day before i was teaching my first "mixed media mandala" class which has a bit of gel printing with a small 3" round plate. so i made about 6 pages obsessively practicing the technique. and then added the stenciled vines on top to make it fancier, lol.

day 21: ghost prints
ghost prints are the second or third pulls of paint off the gel plate, in which generally there are some bits of paint missing. sometimes the paint is still damp and you just press another piece of paper on and get a lighter version. sometimes the paint is a bit dry, so you add a layer of cheap, runny craft paint to loosen it up and get something completely different. sometimes i let the leftover ink build up from a few different prints, then pull it all off in one. you never reallllllllly know what you're going to get, which is part of the fun. 

day 22: multiple layers
ordinarily, this would be my cue to use layers of paper and make a collage. but this time i used layers of paint, instead. my favorite part is the shadow under the butterflies, which i got by using the same stencil on two different layers and just kind of guessing where to place the paper the second time... and IT WORKED!

day 23: spray inks
i made my own spray inks by mixing colorburst and water in tiny spray bottles, the, spraying them onto a stencil spread with a bit of clear gesso. i love how it came out!

we're in the home stretch of the challenge, so i'm hoping to finish up posting the rest of the days tomorrow or monday! in the meantime, happy saturday! ♥
Friday, March 30, 2018

ye olde xmasse carde

we're still celebrating all things vintage and/or vintage-inspired at ♥JINGLE BELLES♥ and you still have plenty of time to join us, which we hope you will! (did i mention there's a prize? you know, if you like that sorta thing...) here's what i made this week:

vintage: partial postcard, sheet music, red doilies and scraps of pages from old ideals magazines; patterned paper: basic grey; cardstock: bazzill; washi tape: eyelet outlet; ink: colorbox; adhesives: elmers brand gluetape, 3m foam tape, sewing machine

i've had these vintage red doilies in my stash for quite some time, and i thought it was about time i used them. torn layers are always a fun way to combine a few different papers, especially if you only have small scraps of them, as i did in this case. the santa image is from a little stack of antique postcards i scooped up last year for a verrrrrrry discounted price, mostly because they were not at all in good condition. whereas that would be off-putting to a collector, if you'd actually like to use them in cards or collages, it's kind of nice to have something you don't feel is "too nice to use" lol! i backed the trimmed down card with red cardstock to frame it out AND frankly to reinforce it, because the crease across santa's face is on the verge of splitting in two. here's a second shot, where you can see that i don't always like to glue all the way out to the edges, i like the look of them being sort of loose and fluttery. (they are actually well attached UNDER each successive layer, tho!)


be sure to check out stephanie's card and link up your own masterpiece at ♥JINGLE BELLES♥!

Thursday, March 29, 2018

what do you do with 31+ gel prints?

the same thing i always do with any group of related things: make them into a little book. or in this case, a BIG book. coffee table size, in fact, because most of my prints are 8x10" and i didn't want to have to trim them.


i started with a de-commissioned library book i got at a booksale for $1. i carefully removed about a third of the pages, to make room for my prints. i saved the "extra" pages though, because the paper is lovely and thick with just a tiny bit of gloss. in other words, PERFECT for gel printing... so quite a few of the discarded pages wound up getting added back in as prints!


usually when i alter a book with a smooth cover, i just collage right on top of it, but for some reason i suddenly thought of those slip-on book covers we made out of grocery sacks for all of our textbooks at the beginning of each school year. so i taped together a few extra large atlas index pages, folded it into the cover shape, then collaged prints on top of that base. i used mostly prints made on thin graph paper or deli paper, for maximum flexibility. i diecut the letters and handcut the numerals for the title #31daysofgelprinting from a nice thick cardstock print. in the end, i only put the numerals on the front cover, but i adorned the title page with the entire hashtag.


most of my prints are just getting attached to an existing page with a tape runner.

 
but there are a few days where i either have a bunch of pages i want to include, OR where i want to reserve the possibility of removing the print later. so in those cases, i've made pockets by gluing the lower edge of one page to the one behind it, then folding down the front. either way, i've just been "labeling" the day number, plus the name of the prompt with a pen. occasionally i'll also make a note of anything special i did, if i think i might want to remember it later.


and i think that's it. i'm hoping to catch up posting the rest of my prints with a big round up over the weekend, meanwhile, i've been updating my instagram account most days, if you'd like to see them all together! ♥

Wednesday, March 28, 2018

EGG-straordinary EGG-cellence

The other day I suddenly realized that despite all the Easter cards I've made this year with my awesome Eyelet Outlet goodies, I hadn't yet made a card with our Colored Egg Brads. So clearly I *had to* make one more Easter card; it's on the EO Blog today!


Something I discovered a couple of years ago is that standard half inch washi tape is exactly the right width to fit between the staves of most sheet music. Which, as you know, is one of my favorite backgrounds for cards; I use it exactly like ordinary patterned paper. As a bonus, the strong horizontal lines of sheet music mean that lining up tape and brads and bling is a breeze... you don't even have to measure!

For this card I've combined the Rabbit Washi Tape with Rabbit Brads and Colored Egg Brads, then added a sentiment with two different sets of alphabet stickers so the "EGGCELLENT" would stand out even more!


I'd like to wish a very Happy Easter to all who are celebrating; and an especially wonderful First Weekend of April to everyone else! ♥

Tuesday, March 27, 2018

no ink??!

i know the stampers out there are going to be very sad when i tell you that this week's challenge at shopping our stash is "NO INK"! which means: no ink pads, no markers, no doodles, no gelli plate, no oxides, no stamping. so what's left? collage, diecuts, stickers, patterned paper, rub-on transfers, ribbon, twine... should i keep going? nah. because by now, if you're not into, you're already gone, lol! here's what i made:


loads of golden oldies here: awesome, ancient basic grey chipboard trees, patterned paper of various ages from simple stories and echo park, some year-or-two old studio calico alphas; this was a pretty quick card to make and i love the spring-like colors! (i am sooooooooooo ready for warm weather!!!)

I used the current sketch saturday to place my elements:


need more ink-less inspiration? SOS is the place, darlings! ♥

Friday, March 23, 2018

an old fashioned xmas

time for another new prompt at ♥JINGLE BELLES♥ and this time we're celebrating "an old fashioned christmas" so we'd love to see cards that reflect that. whether it's done by incorporating actual vintage items or any of the beautiful brand new products with a luscious vintage vibe is 100% up to you! i went with a bit of both:

vintage lace and sheet music from my stash; vintage postcard scanned, reduced slightly, and printed on kodak premium glossy photo paper, then distressed with ranger ink and a tonic edging tool; patterned paper: basic grey; doily from paper anthology; cardstock: staples; adhesives: elmers brand gluetape, 3m foam tape, sewing machine

i've got some actual vintage sheet music and lace from my stash, but the doily paper and doily scrap are new. the angel image kind of splits the difference: i scanned an actual vintage postcard from my collection, reduced it slightly in size to fit my not-quite-A7 card, and hit the edges with a bit of antique paper ink and a distressing tool.

stephanie also has a beautiful card to show you AND you can read about the prize that's up for grabs to one lucky random cardmaker who links up with us this fortnight. (hint: it's from my etsy shop, just enough stuff!) hop over to ♥JINGLE BELLES♥ for all the details!

Wednesday, March 21, 2018

Have a Happy --or Hoppy-- Easter (or Both!)

It's Wednesday once again and I'm up on the Eyelet Outlet blog with a couple more super-easy Easter card ideas for you that combine Eyelet Outlet tape, brads and bling!


My first card features the fastest paper pieced bunny EVER: I've used Skinny Checked tape and punched a one inch circle, a half inch circle and two leaves for ears, assembled them and added a Clear Edge Pink Jewel as a tail. This guy is so cute, I had to let him hop right into my sentiment in place of the "O"!


I formatted the rest of my letters in a fun free font called "La Unica", printed them out about 1.25" tall (perfect for an A2 card) and then used the pattern to cut one set made from plain Bunny Tape and one set from Bunny Tape surrounded by strips of Pink Checked Tape. I decided I liked the latter best with the pieced bunny, so I mounted them on foam tape and used stickers for the rest of my sentiment.


Since I had the Bunny Tape set of letters leftover, I decided to make another card. This time I made a panel with Green Pattern Tape, set on a mat of Pink Checked Tape to hold my sentiment and my bunny mascots are two Rabbit Brads, flanking the word "Easter".


I'm pretty sure EVERYbunny would love to get a fun card for Easter... why not get out your Eyelet Outlet tape and brads to make your own masterpieces?

Tuesday, March 20, 2018

things that don't really go together... together!

before i explain the title, i should mention that this week's challenge at shopping our stash is to make an easter card. which i did. see?

vintage papers from my stash and illustration from an old, falling-apart garden book; washi tape: scotch + little b; alphabets: making memories + american crafts/thickers; patterned paper: basic grey; adhesives: elmers brand gluetape, 3m foam tape, sewing machine

now the title: a couple of weeks ago, i tried out a new kind of collage background, where i just sort of messily masking-taped a few different sized pieces of vintage paper together, and then used the larger composite sheet of paper as a background. so far i've mostly used it for gelli printing. but the other night when i sat down to make this easter card i thought, i wonder if i could make card backgrounds that way? and i started playing with some scraps of vintage paper and it turned out, YES, i could. instead of using raw, messy, masking tape to hold the pieces together i neatly applied some washi tape at the joins. i chose these beautiful irises from an old book for my focal image, added some (elderly) chipboard alphabet stickers for a sentiment and mounted the whole thing on a nice neutral plaid by the late, great, basic grey. et voila. things that don't really go together... together! of course there's a strong arguments that you could paste these gorgeous irises onto a cereal box and they'd still look good, lol.


meanwhile, there are lots more varieties of easter cards, courtesy of my design team sisters, over at SOS! ♥

Saturday, March 17, 2018

peanut butter GELLI time!

since i've been participating in 31 days of gel printing with birgit koopsen via instagram, a few people have asked me what a gel plate is, and if they should get one. the first part is easy: the plate itself is made of semi-hardened, non-edible, gelatin, so it's a solid, re-useable surface, but it's somewhat squishy. which makes it a really good surface to apply and manipulate acrylic paint, and then print the results onto paper, fabric, canvas or... whatever. 


so do you NEED one? there's really only one "pro" argument and that is: it's FUN! it's a lot of fun, it's very creative and quite addicting. you can make backgrounds, even finished compositions on a variety of surfaces. there's a huge serendipity factor which sometimes works gloriously and mysteriously in your favor and sometimes is frustrating as heck. 


the cons? it's MESSY. how much of a drawback that is really depends on your own personality and maybe also on whether you have a dedicated art space or if you craft on your grandmother's beautiful and priceless chippendale dining table, lol. you will also need some very specific supplies, including a gel plate (there are several brands) --which, btw, you'll need to store FLAT in its case, to avoid damaging it. you'll also need a good hard rubber brayer, and several types of acrylic paint, including (ideally) some of the more expensive heavy body acrylics.


and finally yes, there's a learning curve. gel printing isn't hard, but it's not really like any other papercrafting technique most of us have done before. so if you do get a plate, you'll want to watch some videos, and pin some examples and follow birgit koopsen or carolyn dube or kate crane and just generally see as many examples as you possibly can.

speaking of examples, here are a few more of mine! (nice segue, eh?!)


day 9: packaging
seriously, if you're at a loss for inspiration, you could start by following birgit koopsen on the social media platform of your choice. she is such a great source of ideas and posts pics, written word AND vids. i stole some of my packgaging ideas from her, including using an empty blister pack of allergy pills and the tray thingie a set of colorful pens came in. i also used a few lids and a thread spool. and reaffirmed my love of old, lined, spiral bound notebook paper.


day 10: fabric
coincidentally, my mom had given me some old muslin hankies the day before this prompt came up. they were worn, torn, yellowed and had stains here and there. which from my standpoint made them PERFECT. but i also enjoyed printing on...


DENIM!!!
you need to maximize the contrast of your colors for them to show up well. oh and yellow or even gold paint will take on a greenish tint because of the blue dye in the denim! 


day 11: paper tubes
i had planned to just stamp rings with mine, but i happened to see birgit's post and she'd used her tubes to make DIY roller stamps. alas, i don't actually love what i made this night, but that's ok, it's fun to try something this far "outside the box".


day 12: hearts
this happened to fall on a mandala monday, so i punched hearts and circles from some of my extra prints of the previous week and made a little "creation".


day 13: pigment inks
i had NO IDEA you could use inks on a gel plate. it turns out you can get some really cool effects, as well! luckily i had a couple of those ancient colorbox petal point thingies, so i could go all rainbowy!


day 14: tissue paper
it's more delicate than deli paper, but the matte finish and super-thin texture mean that gelli prints on tissue are amazing for layering! also... since it comes in BIG SHEETS you can make gi-huge-ic prints! (you know... if you like that sorta thing... which i do...)


day 15: lines
as much as i'm looooving this challenge it has kept me away from both my pens and my colorbursts for two entire weeks. i decided to see what i could do about that. i looked around online and discovered that gesso was the key to this endeavor. i liked the clear variety best because it rendered the brightest colors. i bloomed one shade at a time on my 3" round mini plate and "stamped" it thru a very geometric stencil to work in the "lines" prompt. it's a good start, but i definitely have more ideas...

♥♥♥
i hope you've had a wonderful weekend, but if not, there's still time to sneak in a tiny bit of sunday night FUN, right?! 
♥♥♥

Friday, March 16, 2018

sing, santa! sing!

we're still celebrating all things musical at ♥JINGLE BELLES♥ and you still have time to join the fun. just make a card that incorporates sheet music, music notes or instruments-- easy, peasy! here's what i made:

stickers: doodlebug + recollections (the tree); sheet music alphabets from my etsy shop; chipboard letters: thickers/american crafts; patterned paper: photoplay; cardstock: bazzill; enamel dot for rudolph's nose: eyelet outlet; adhesives: elmers brand gluetape, 3m foam tape, sewing machine; here's a tip for when you want to make the stitches blend in with, say, red chipboard letters, but don't feel like changing your white thread & bobbin: sew the letters on with the white thread, then take a red brush marker and caaaaaaaaaaaarefully tint the stitches! :) 

i've used my own diecut sheet music alphas from my etsy shop, just enough stuff, but other than that it's all ordinary xmas stash: adorable, dimensional doodlebug stickers, super-useful chipboard letters, and maybe the best xmas plaid paper of all time, courtesy of photoplay!


stephanie also has another fabulous, music-centric card to show you, it's over at ♥JINGLE BELLES♥ right now, darlings!

Wednesday, March 14, 2018

Never Leave Two Bunny Cards Alone On Your Blog...

...because when you come back, there'll be *three* bunny cards! See?


Case in point, I'm on the Eyelet Outlet Blog today with a trio of Easter cards I hope EVERYBUNNY will love! Card one features my favorite new Bunny Tape, which I love because it's got loads of fun spring colors. I accented the purple on this card with a few strips of Skinny Glitter Purple Tape. A pair of purple Paper Flowers holds a couple of adorable Rabbit Brads who are wishing us a happy holiday via an Easter Bubble Brad.


My second card uses the same Bunny Tape, but this time instead of covering the whole panel, I've alternated strips with Pink Checked Tape, Skinny Pink Washi and Skinny Green Washi. I've stacked one pink and one white Paper Flower to make a little spot for two Pastel Rabbit Brads and another Easter Bubble.


My third card is a bit of a cheat, because that beautiful Rabbit Wide Washi Tape is exclusive to the Eyelet Outlet Booth and isn't available through the online store! Which gives you all the more reason to check out the Trade Show List on the right sidebar, so you can be sure to know when Eyelet Outlet is coming to your town! I've added a few strips of Skinny Green Tape and this time a pair of Chocolate Bunnies is talking through an Easter Bubble, on top of a few white Paper Flowers.


There are even more cool Easter brads and tapes in the online store and in the EO booth... I'm positive you can find YOUR favorites!

Tuesday, March 13, 2018

for the birds

this week's challenge at shopping our stash is as fun as it easy: we want you to literally #putabirdonit :) which is the kind of thing you don't have to ask me twice! my birds are from a vintage bird book (surprise, lol!) but yours could be in the form of stamps, stickers, a journal card; realistic birds, cartoon birds, cute digi stamp birds; penguins on a christmas card, flamingos (my favorite!*) on a summery scrapbook page, an owl icon in your bullet journal... any bird, any context, any theme, any project! here's my card:

birds from an old, falling-apart peterson's field guide, xyroned onto plain white cardstock, then fussycut + vintage sheet music; patterned paper: daisy d's green print + heidi grace flocked foliage paper that i think must be literally 15 years old--and yet i'm bizarrely glad i held onto it, lol; cardstock: core'dinations; florals: prima; foliage and heart dies: spellbinders; ink: colorbox; adhesives: elmers brand gluetape, 3m foam tape, sewing machine

ok, so, pretty much a textbook "laureny" card here. vintage birds, vintage (but in this case, bright white) sheet music, loads of ancient prima flowers and leftover foliage diecuts from one of my january classes. i used two sizes of nestie hearts to make the double window, popped the very edges of the openings up on foam tape, but let the sides be flat, then stitched around the edges for a little more texture. et voila. #putabirdonit 101!


there are loads more ways to incorporate our feathered friends into your next project, however, and the lovely ladies of the SOS design team would enjoy showing you some of those RIGHT NOW, darlings! ♥

*note to my fellow flamingo lover, sue c: flamingos were definitely my first thought, but the card i really need right now is an anniversary one for my in-laws and they like the backyard birds of the northeastern us, so i went with goldfinches instead. :)

Saturday, March 10, 2018

because i need yet ANOTHER obsession

joining month long challenges on social media is always a mixed bag. because on the one hand, it takes up quite a bit of time. on the other hand, you get A LOT of practice at a new technique. in this case, birgit koopsen (one of the all-time QUEENS of gel printing, imo) announced that she'd be hostessing an even called "fall in love with your gelli plate" just after i found out i'd be teaching a class that features (very limited) gel printing techniques. so this seemed like the PERFECT time to focus on gelli. here's what i've made so far:

day 1: circles
ok, so, there is no way i can actually print with (and clean up after) my gelli plate every single day. so for some days i'm using older prints in (hopefully) interesting ways. like collage, which is always my comfort zone, lol. for this one, all the prints are leftovers from two weeks ago, when i was making samples for my upcoming "mixed media mandala" class. i punched circles out of a print i didn't love and placed them inside squares of a different print i didn't love. and then layered them over the reverse of a deli paper print i only loved portions of. 

day 2: peek through
both of these prints are from a gelli play date with stephanie last summer. the bricks are on deli paper, in which i've torn a sort of jagged hole. the print beneath is gold and white heavy body acrylic paint on navy cardstock. there's LOADS of stitching holding the two together. not because it needed loads, i just got a little carried away at the sewing machine...

day 3: stencils
in this case, rather than stencils, i've mostly used masks, but the concept and procedure is the same. i really like this one b/c it was made ON THE DAY, in the midst of a gelli marathon with my friend anna, AND i have not done anything to the original print! because part of what i want to do this month is work at composing on the plate, so to speak, so that my prints are more intentional, and can potentially stand alone.

day 4: texture
i nearly used this one for the "stencil" prompt, it was made on the same day, and it looked pretty good as is (see below) but i had used a compound, taped-together set of book pages and a postcard (also below) so it had a bit of texture already. then i "stamped" on the full-sized  blue gelliprint base with the small round gel plate which gave it a bit more texure. mostly, though, i was DYING to outline the butterfly and make it stand out more, so i sewed around with the machine. and then yeah... i added a little bit of modelling paste all over the butterfly's body to make it even more textural. i think, technically, this is cheating, but i don't care, lol!


day 5: crayon resist
i really love the concept of this technique. but so far, my results have been underwhelming. basically you color with crayon wherever you don't want the paint to stick (see "before" pic below). then you pull your print on top, like usual. after the paint dries, you scrape it off and have the contrast of your crayon design showing through. except... you need to really color HARD and get a thick coating of wax. and you need to scrape off with a metal palette knife, very patiently. and it helps to thin out the paint with water. and... well, as i said, my results on this one so far have not been stellar. but i'll try again, at some point! 


day 6: flower
total cheater day, because i just did not have time to make and clean up the fresh-print paint mess. so i took a previously made, blue and purple print that i didn't love on its own, and made it into flower petals. on top of a stencil-cleaning-off page of notebook paper. ta-daaaaa.

day 7: threads
in retrospect, having seen the gallery on instagram, i realize that what we were SUPPOSED to do was use bits of thread or yarn as a mask on our plate, then pull prints with the cool undulating thread shapes on them. instead, for some reason, my brain said, "make plaid!" so i did. using multiple pulls and cardstock masks. and then i typed and sewed on top. sometimes it's really tiring to be me, lol.
(ps: there's a flipagram showing all the steps of this on my IG account.)

day 8: silhouette
on the other hand, this day i not only understood the brief, i was able to do it successfully AND i love the results! which is pretty much the trifecta of gelliprinting right there! i used the first handcut stencil and mask i ever made (the buddha) plus some storebought stencils in the background, and a little acrylic heart shape as a secondary mask. i this case i not only like the "real" print, i also like the "cleanup" print (below, left) and the "ghost" on which i cleaned off my stencils, brayer and masks (below, right).


♥♥♥
i hope you are having the best weekend EVER!
(and that you'll find time to do something fun and creative, just for yourself!)
♥♥♥