Showing posts with label garden party stamps. Show all posts

Monday, May 6, 2024

Bold & Bright

It's a coolish, greyish day in central New Jersey, which seems like the perfect time for a big, bold Mandala to brighten up your Monday! This one features Wendy Vecchi's Garden Party stamps from Spellbinders; radiant, radiating, rainbow shades of Wendy's Archival Inks from Ranger; and a whole lot of MAKE ART and Studio 490 stamps and stencils applied over and under the hand-drawn mandala shapes I rendered with my Letter It Fineliners


I work on mandalas in many different ways to keep things interesting, but for those interested in process, this piece went... roughly... like this:

  • Lightly pencil-sketch a few concentric circles, centered on an 11x11" piece of bristol board. An old school compass is good for this, you can even trace rolls of tape or your nested circle dies, but I do also love the Helix Circle Tool!
  • Apply Archival Inks with a Mini Ink Blending Tool and Domed Foams, working in rings from the center outwards and allowing them to blend wherever they overlap. Colors are: Prickly Pear, Bluebird, Night Sky, Cactus Flower, Rosey Posey, Peachy Keen, and Sunflower... then around again to Prickly Pear, etc.
  • Stamp the large floral cluster from the Garden Party set in the center in Watering Can Archival.
  • Add background patterns by stamping a variety of small elements and portions of large background stamps more or less randomly, in coordinating colors.
  • Draw the basic structural lines with a .01 or .04 Letter It Fineliner, again working from the center outwards; starting with the two large concentric circles, adding large petal shapes and large circles between the petals.
  • Add detail lines and shapes such as the rings of smaller circles and petals, plus the secondary "shadow" lines inside or outside the larger shapes.
  • Using sticky notes to mask if necessary, neaten up the loose rings of color with Ranger Detail Blending Tools; for example I applied more Bluebird ink to the area around the Garden Party florals so the circle border is a darker green; I pulled more Peachy Keen out into the large hand-drawn petals; darkened the ring of smaller circles around the center, etc.
  • Add more definition with a white paint pen in the form of lines, dots and small hearts, then outline with a .01 Fineliner.
  • One final neatening up of shapes and shadow lines with coordinating brush pens wherever necessary.

Monday, February 26, 2024

It's a Very Vecchi Mandala Monday

This week I've combined some of my all-time favorite Wendy Vecchi products, stretching from her brand new Spellbinders' Garden Collection (Garden Party Stencils and Heartfelt Thanks & Scallops Dies); to her Ranger Archival Inks (full list of colors below); and all the way back to her gorgeous Studio 490 stamps and stencils to make a massive multi-media mandala! 


I used the older Studio 490 background stamps and stencils to create seven different panels of patterned paper. I used one for the central circle and one for the background; then diecut with all five sizes of Heart dies from Heartfelt Thanks to make the petals. For the center medallion I used the Garden Party Stencils WITHOUT the stamp, deciding instead to use a black finepoint Letter It Fineliner to add some really rough outlines that fitted the funky/grungy mood of the piece.


Wendy Vecchi Designer Series Archival Ink colors used are: Rosey Posey, Pink Peony, Orange Blossom, Sunflower, Tea Rose, Prickly Pear, Leaf Green, Cornflower, Sky Blue and  Night Sky.

Saturday, February 3, 2024

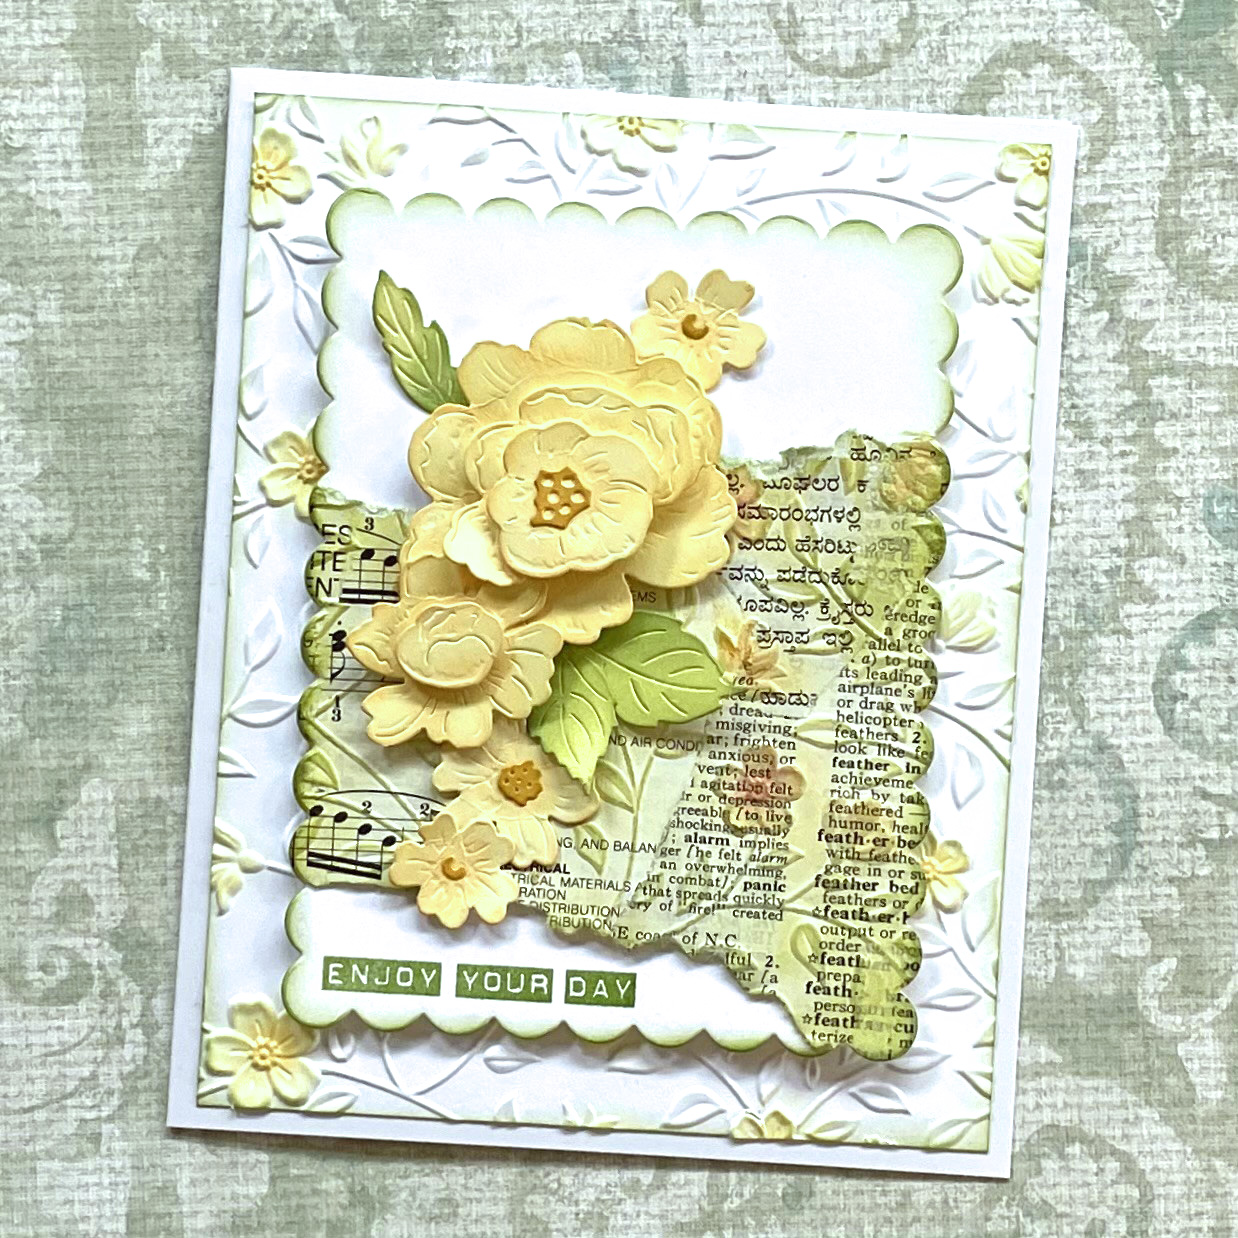
Enjoy Your Day

Happy mail ALWAYS makes my day, so I try to make sure I send out plenty of special cards to friends and family. This A7 card features Wendy Vecchi's gorgeous Vintage Florals die set (new from Spellbinders) colored with three shades of yellow Archival Ink from Ranger (Buttercup, Sunflower and Goldenrod, to be precise) and popped up on layers of foam tape for extra dimension.


My plan for this card was to make a mostly-white collage of vintage text paper, run it through with the Flowers and Foliage 3D Embossing Folder, and use that for the background. Unfortunately, the text paper kind of hid more of the embossed flowers than I liked, so I used a Mini Blending Tool to apply yellow and green Archival to the design, which is kind of cool; but the embossing still didn't show up as much as I had hoped. However, a torn section of the collaged piece did make a nice accent for a plain white panel that I cut out with the largest die from the Heartfelt Thanks and Scallops set. Then I embossed plain white cardstock with the folder, added a little bit of Buttercup Archival to the flowers and some Leaf Green around the edges and finally, I had the look I was going for! 


I used one of the label-maker-style sentiments from the Garden Party Stamp and Die set as a sentiment, et voila! Be sure to check out Wendy Vecchi's Instagram Account and the Make Art with Wendy Vecchi Facebook Group for lots more ideas and inspiration for using Wendy's fabulous Garden Party Collection!

Monday, January 29, 2024

Hey Friend, Hello

As you know, I'm absolutely smitten with Wendy Vecchi's Garden Collection from Spellbinders. Today I'm test driving the Garden Party Stamp and Die set, which also has coordinating stencils... meaning that coloring this gorgeous bouquet is effortless! I used Wendy's Archival Inks from Ranger in Buttercup, Sunflower and Goldenrod to color the roses, Pink Peony and Rosey Posey for the smaller flowers and a blend of Prickly Pear and Leaf Green on the foliage. The background was created by stamping (...and stamping...and stamping, lol...) the dymo-style Hey Friend and Hello sentiments over and over, on the diagonal until I had filled a Perfect Cardstock panel. Then I diecut the flower cluster from it's backer and used the same die on the background so I could inset the bouquet; adding a couple of (hand cut) extra blooms on top. Finally, I used the nearly-discarded outside piece of of cardstock from diecutting the biggest frame from Heartfelt Thanks and Scallops (for another card that I'll show you later this week) and matted on Goldenrod cardstock. The "Hello" sentiment comes from Wendy's Vintage Florals die set.

Tuesday, January 23, 2024

The Blues Are Still Blue*

Central New Jersey continues to be cold and wintery but the bloomin' beautiful flowers in Wendy Vecchi's Garden Collection from Spellbinders definitely warm things up and Wendy's selection of blue Archival inks from Ranger is (arguably) the cure for the blues. This card has A LOT of blue... and A LOT of layers... as you may have noticed.


From the bottom working upwards we have: white cardstock (it's a 6 x 5" card... weird size but... that's what happened, lol); pale blue cardstock; lavender cardstock; Wendy Vecchi MAKE ART Washi Tape; Chippie from the Bases and Frames set, tinted with Bluebird Archival; white cardstock stamped with multiple repeats of the large flower cluster from Wendy's Garden Party Stamp and Die Set, colored using the coordinating layering stencils with Bluebird, Morning Glory, Cornflower, Cactus Flower, Violet, Rosey Posey and Leaf Green Archivals; Heart Chippie from the Bases and Frames set, stamped and colored in the same manner, then lined up over the same area in the background; stack of ancient paper flowers; Eyelet Outlet Dragonfly Brads.


Very much loving the convenience and quickness of using the layering stencils to add color. You can purchase the stamp and die set on its own, but I recommend the Garden Party Bundle. The stencils are numbered AND have registration marks at the four corners to make aligning them a no-brainer. and they're generously sized so that there's plenty of room to place all four magnets on the Stay-tion.


If it's a bit cold and grey where you are, why not immerse yourself in glorious color... it'll be Spring in no time! ♥

*"The Blues Are Still Blue" is my favorite Belle and Sebastian song. Just sayin'...