one of my favorite things to use in place of traditional giftwrap is an old map. it doesn't have to be vintage, necessarily, though this one is. in place of ribbon, i love to wrap long strips of tissue paper or wall paper (this has both, actually) around a package. in lieu of a traditional greeting card, i've topped off with a random stamp/stencil/ink extravaganza that i made for an art journaling prompt at some point; with a personal message written on the back. a bit of thin cord with beads on it literally ties the whole thing together.
for a smaller present, a vintage book page can serve perfectly as gift wrap. in this case it's a page of applique patterns for a quilting friend. i added a couple of strips of butterfly washi tape to give it a bit of color and topped off with twill that's printed like a tape measure, and some slightly frayed and faded silk flowers i got at a garage sale. the most interesting thing about this, though, you cannot quiiiiiiiite tell from the pic: the top and bottom ends of the giftwrap are not actually sealed. so essentially, this is a sleeve of paper that i've wrapped around and attached at the back, which it is possible to leave intact, but still slide out the gift. which sounds like a crazy thing to do, unless you've had people refuse to UN-wrap their gift because it's too fancy to "ruin" lol.
and then it makes perfect sense, trust me!
here's a set of photos that better illustrates what i mean:
behold a fun vintage map collage, featuring a volvo that is the same model (but a different year) as my chiropractor's most prized possession. it looks like any other wrapped present, but really it's just a sleeve that isn't attached in any way to the gift itself.
see?!
you can slide the gift-- in this case dvds-- out with no injury to the collage.
i'm definitely not the first person to notice and appreciate how convenient giftbags are. i tend to bulk buy the plain ones, then dress them up. sometimes i attach decoration directly to the bag, but often i decorate a panel... which i then attach to the bag with minimal adhesive (like 4 small squares of foam tape) so that it can be removed and saved, if the recipient desires. this is something i started doing when my nieces and nephews were young, in their case, i usually made a "happy birthday" sign with their name on it. but it's also kind of good for using up random watercolor or collage panels, made to try out an idea or in answer to a prompt or challenge. this one was for a "rainbow" theme, and i had painted the hearts in loads of shades of colorburst, then let the colors drip and mingle. the "happy" was an experiment using variegated yarn that didn't quite work for what i needed at the time, but i liked it too much to chuck out. to round off the theme, i smudgily colored some white plastic letter stickers with alcohol ink markers.
and finally, a way to wrap a gift using patterned papers which are much too small for the gift in question: sew a bunch of them together, end to end!!! this example is from several months ago. it consists of five coordinating patterned papers, with twill in place of ribbon and a mixed media butterfly instead of a bow. scroll down for another example that has step-by-step directions!
this is especially fun when you have a bunch of partial sheets of patterned paper you'd like to use up. or if you have some fragile sheet music or book pages you'd like to incorporate, which really would not be strong enough on their own.
here are the steps:
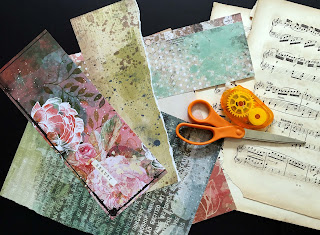
1. gather your papers
2. tack the pieces together
...on the back, using your favorite dry adhesive quite sparingly; tear the edges, if you'd like, to give the final product a bit of texture.
3. sew along each of the joins
...with one or two lines of machine stitching; feel free to ramble a bit, and make more than one pass if you'd like; choose a coordinating thread color if you want it to blend in, or a contrasting one to STAND OUT! :)
4. wrap your gift
...in the ordinary way, or construct a sleeve, like i've done here.
5. check placement
...before you secure the ends; in this case, i shifted the whole design over about three inches, so the most interesting seams would show on the top of the package!
6. decorate the package
...with ribbon, cord, yarn, or-- in this case-- a double bow of sparkly tulle and a big silk peony!
♥♥♥
i hope you'll be inspired to try some "funky" giftwrap styles, the next time you have a present to wrap. meanwhile, i hope you're having a wonderful sunday afternoon!
♥


A Lauren wrapped gift is the very best gift.
ReplyDeleteGorgeous gift wrap, great tutorials too on "how to" and you know how much I need the "how to" do collage lol.
ReplyDeleteBeautiful stunning ideas. I'd love to get a glimpse inside your mind. X
ReplyDeleteSuch inventive and GORGEOUS wrappings, love these.
ReplyDeleteWow.
ReplyDelete