Showing posts with label 31 days of gel printing. Show all posts

Sunday, April 1, 2018

gel printing wrap up!

it's hard for me to express how amazingly quickly the whole entire month of march FLEW past!!! probably because i used every spare moment --and a few that technically weren't spare because i was actually supposed to be doing something else entirely, lol-- gel printing. here now, the last lot of those essperiments!

day 24: leaves
on this day i pretty frankly cheated. because birgit koopsen posted this amazing video of how to do transfer prints from books and magazines on the gel plate... (you really should go watch the video, even if you don't have much interest in gel printing!) ...and after i saw it, that's all i wanted to do. the technique doesn't always work. you need to have just the right combo of ink (in the illustration) and paint (on your plate); and frankly i'm still not that great at predicting when that will happen. i had a blast playing with the idea though. and i know i'm going to do it again and again.
(there are some leaves that you can very nearly almost see in the green print and the purple one!)

day 25: foam stamps
we were meant to use homemade foam stamps. which i realize are easy to make... if you have craft foam. i thought i had some. but apparently not. luckily, there are some really nice pre-made foam stamps out there, like this hollyhocks one from donna downey.

day 26: from the hardware store
there are some INCREDIBLE prints for this prompt in the #31daysofgelprinting hashtag on instagram. seriously, some of the most creative ones of the whole month! i just kind of froze, lol. then i remembered that home depot is a bit like a hardware store, right? (just go with me, kthx?) and that i had some big paint chip folders and drywall tape from home depot. so i'm calling that good.

day 27: cardboard
i stripped the top layer off some corrugated cardboard to make a couple of texture tools: one flat, the other rolled up and taped together. i also printed ON cardboard which i really like the look of.

day 28: comb
i used a ridgey texture tool to mix quinacridone magenta and hansa yellow. i was expecting a sort of pinky-orange and got... FLAMES, lol! 

day 29: egg carton
i think i might have to write in to wegman's and complain that their egg cartons leave a much less interesting imprint than those of other egg cartons throughout the world. because of all the samples i've seen for this prompt, mine are my least favorite, lol. 
(they were admittedly lots of fun to make, however!)

day 30: water soluble crayons
ironically, i was at the ink pad on wednesday standing next to a pack of dina wakley's scribble sticks feeling *VERY* tempted. but i resisted the purchase because i have plenty of gelato crayons, which i thought were pretty close to the same consistency. they aren't. but i managed to make them work (sorta!) with the gel plate by lightly spritzing my triangular mini plate with water, then coloring the plate with a gelato, then stamping the triangle through an admittedly awesome stencil that my friend josh pointed out looks a bit like the interior of a colorfully redecorated TARDIS! ♥♥♥
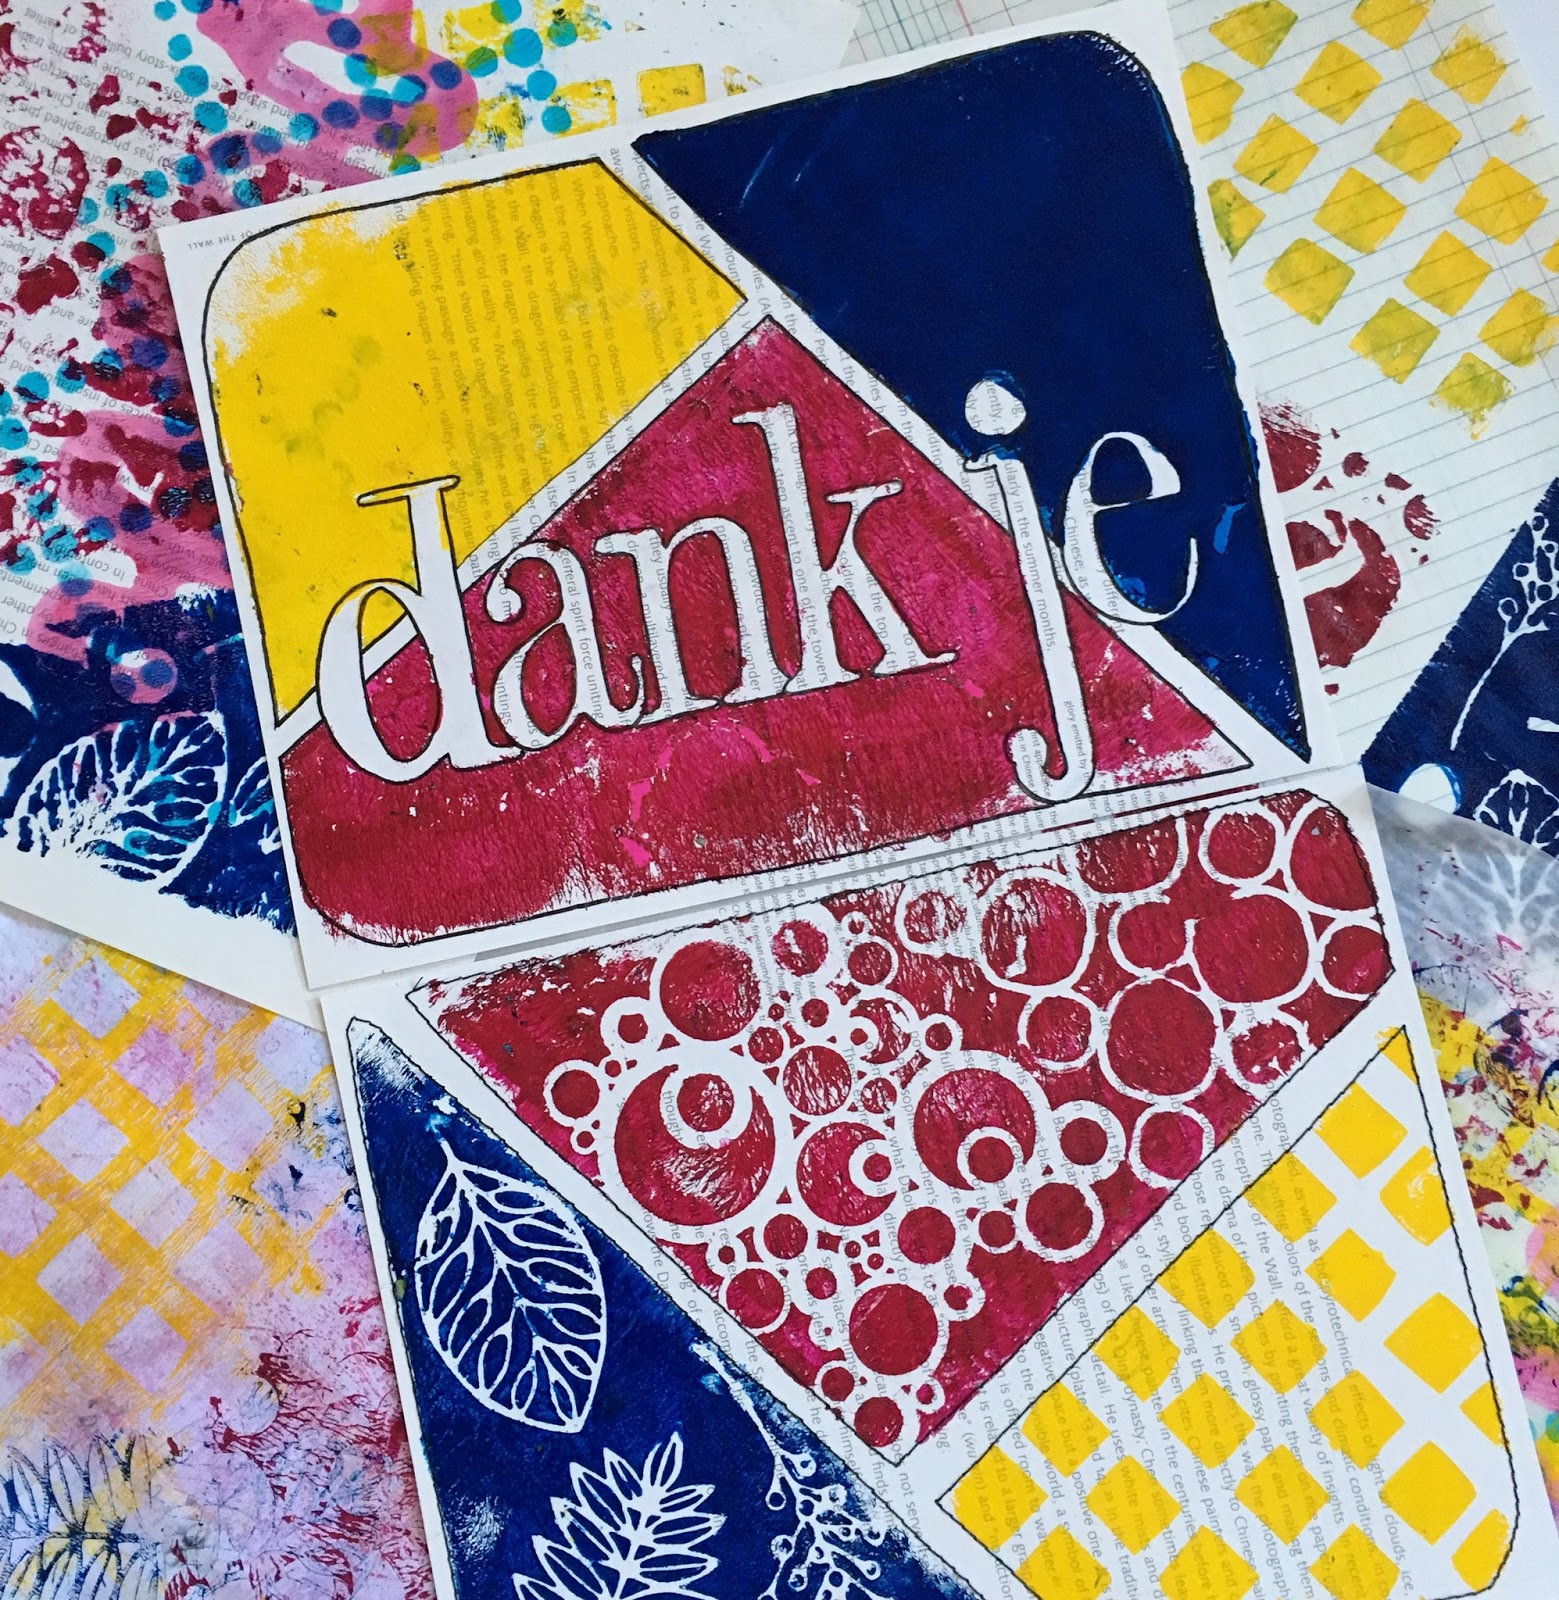
day 31: primary colors
shocking true confession: despite a growing collection of heavy body acrylic paints, it turns out i don't actually own a true RED. so quinacridone magenta once again kindly stands in and does (i think) quite a creditable job anchoring my mondrian-inspired color blocks. you may have guessed that "dank je" means "thank you" in dutch, which is the first language of birgit koopsen who so kindly hosted this entire month of gel printing awesomeness!

and there you go, the month is DONE! at the suggestion of someone from the very cool gelatin printing enthusiasts' group on facebook i made a flip-through flipagram of the altered book which holds all of my prints for the month. you can see it on facebook or instagram! meanwhile, the 31 days of gel printing label gets you all of the blogposts conveniently grouped together, should you need them. (possibly a great cure for insomnia, lol!)

♥♥♥
wishing everyone who's reading this a very happy:
easter
passover
april fool's day
sunday
(please select all that apply!)
♥♥♥

Saturday, March 31, 2018

more gel printing, anyone?

be a sport and say, "yes" ok... otherwise the whole rest of this post falls really flat. thanks! here ya go:

day 16: feathers
i used some cool 7gypsies acrylic feathers as masks and some pretty large real feathers to "stamp" with. i'm just going to skip over the part where i tried to use small feathers as masks, got them hopelessly entangled and spent a really long time picking all the wet, painty, broken feathery bits off my brayer.

day 17: letters 
i placed some ancient heidi swapp acrylic letters BACKWARDS on my gel plate as masks, then printed around them using the colors from color crush creative palette #39: happy dance

day 18: numerals
i altered a book and called it, "#31 days of gel printing" and you can see more of it in this post!

day 19: book paper
the background pattern is a stencil coated with clear gesso and rainbow shades of colorburst. the mandala is a rejected panel from my "emboss like a boss" class samples which really has nothing to do with gel printing, but it featured many of the same colorburst shades and looked really nice with the background, so i added it.

day 20: black and blue
this happened to fall the day before i was teaching my first "mixed media mandala" class which has a bit of gel printing with a small 3" round plate. so i made about 6 pages obsessively practicing the technique. and then added the stenciled vines on top to make it fancier, lol.

day 21: ghost prints
ghost prints are the second or third pulls of paint off the gel plate, in which generally there are some bits of paint missing. sometimes the paint is still damp and you just press another piece of paper on and get a lighter version. sometimes the paint is a bit dry, so you add a layer of cheap, runny craft paint to loosen it up and get something completely different. sometimes i let the leftover ink build up from a few different prints, then pull it all off in one. you never reallllllllly know what you're going to get, which is part of the fun. 

day 22: multiple layers
ordinarily, this would be my cue to use layers of paper and make a collage. but this time i used layers of paint, instead. my favorite part is the shadow under the butterflies, which i got by using the same stencil on two different layers and just kind of guessing where to place the paper the second time... and IT WORKED!

day 23: spray inks
i made my own spray inks by mixing colorburst and water in tiny spray bottles, the, spraying them onto a stencil spread with a bit of clear gesso. i love how it came out!

we're in the home stretch of the challenge, so i'm hoping to finish up posting the rest of the days tomorrow or monday! in the meantime, happy saturday! ♥

Thursday, March 29, 2018

what do you do with 31+ gel prints?

the same thing i always do with any group of related things: make them into a little book. or in this case, a BIG book. coffee table size, in fact, because most of my prints are 8x10" and i didn't want to have to trim them.


i started with a de-commissioned library book i got at a booksale for $1. i carefully removed about a third of the pages, to make room for my prints. i saved the "extra" pages though, because the paper is lovely and thick with just a tiny bit of gloss. in other words, PERFECT for gel printing... so quite a few of the discarded pages wound up getting added back in as prints!


usually when i alter a book with a smooth cover, i just collage right on top of it, but for some reason i suddenly thought of those slip-on book covers we made out of grocery sacks for all of our textbooks at the beginning of each school year. so i taped together a few extra large atlas index pages, folded it into the cover shape, then collaged prints on top of that base. i used mostly prints made on thin graph paper or deli paper, for maximum flexibility. i diecut the letters and handcut the numerals for the title #31daysofgelprinting from a nice thick cardstock print. in the end, i only put the numerals on the front cover, but i adorned the title page with the entire hashtag.


most of my prints are just getting attached to an existing page with a tape runner.

 
but there are a few days where i either have a bunch of pages i want to include, OR where i want to reserve the possibility of removing the print later. so in those cases, i've made pockets by gluing the lower edge of one page to the one behind it, then folding down the front. either way, i've just been "labeling" the day number, plus the name of the prompt with a pen. occasionally i'll also make a note of anything special i did, if i think i might want to remember it later.


and i think that's it. i'm hoping to catch up posting the rest of my prints with a big round up over the weekend, meanwhile, i've been updating my instagram account most days, if you'd like to see them all together! ♥

Saturday, March 17, 2018

peanut butter GELLI time!

since i've been participating in 31 days of gel printing with birgit koopsen via instagram, a few people have asked me what a gel plate is, and if they should get one. the first part is easy: the plate itself is made of semi-hardened, non-edible, gelatin, so it's a solid, re-useable surface, but it's somewhat squishy. which makes it a really good surface to apply and manipulate acrylic paint, and then print the results onto paper, fabric, canvas or... whatever. 


so do you NEED one? there's really only one "pro" argument and that is: it's FUN! it's a lot of fun, it's very creative and quite addicting. you can make backgrounds, even finished compositions on a variety of surfaces. there's a huge serendipity factor which sometimes works gloriously and mysteriously in your favor and sometimes is frustrating as heck. 


the cons? it's MESSY. how much of a drawback that is really depends on your own personality and maybe also on whether you have a dedicated art space or if you craft on your grandmother's beautiful and priceless chippendale dining table, lol. you will also need some very specific supplies, including a gel plate (there are several brands) --which, btw, you'll need to store FLAT in its case, to avoid damaging it. you'll also need a good hard rubber brayer, and several types of acrylic paint, including (ideally) some of the more expensive heavy body acrylics.


and finally yes, there's a learning curve. gel printing isn't hard, but it's not really like any other papercrafting technique most of us have done before. so if you do get a plate, you'll want to watch some videos, and pin some examples and follow birgit koopsen or carolyn dube or kate crane and just generally see as many examples as you possibly can.

speaking of examples, here are a few more of mine! (nice segue, eh?!)


day 9: packaging
seriously, if you're at a loss for inspiration, you could start by following birgit koopsen on the social media platform of your choice. she is such a great source of ideas and posts pics, written word AND vids. i stole some of my packgaging ideas from her, including using an empty blister pack of allergy pills and the tray thingie a set of colorful pens came in. i also used a few lids and a thread spool. and reaffirmed my love of old, lined, spiral bound notebook paper.


day 10: fabric
coincidentally, my mom had given me some old muslin hankies the day before this prompt came up. they were worn, torn, yellowed and had stains here and there. which from my standpoint made them PERFECT. but i also enjoyed printing on...


DENIM!!!
you need to maximize the contrast of your colors for them to show up well. oh and yellow or even gold paint will take on a greenish tint because of the blue dye in the denim! 


day 11: paper tubes
i had planned to just stamp rings with mine, but i happened to see birgit's post and she'd used her tubes to make DIY roller stamps. alas, i don't actually love what i made this night, but that's ok, it's fun to try something this far "outside the box".


day 12: hearts
this happened to fall on a mandala monday, so i punched hearts and circles from some of my extra prints of the previous week and made a little "creation".


day 13: pigment inks
i had NO IDEA you could use inks on a gel plate. it turns out you can get some really cool effects, as well! luckily i had a couple of those ancient colorbox petal point thingies, so i could go all rainbowy!


day 14: tissue paper
it's more delicate than deli paper, but the matte finish and super-thin texture mean that gelli prints on tissue are amazing for layering! also... since it comes in BIG SHEETS you can make gi-huge-ic prints! (you know... if you like that sorta thing... which i do...)


day 15: lines
as much as i'm looooving this challenge it has kept me away from both my pens and my colorbursts for two entire weeks. i decided to see what i could do about that. i looked around online and discovered that gesso was the key to this endeavor. i liked the clear variety best because it rendered the brightest colors. i bloomed one shade at a time on my 3" round mini plate and "stamped" it thru a very geometric stencil to work in the "lines" prompt. it's a good start, but i definitely have more ideas...

♥♥♥
i hope you've had a wonderful weekend, but if not, there's still time to sneak in a tiny bit of sunday night FUN, right?! 
♥♥♥