Friday, January 31, 2020

I Don't See Any Kings...

It's true there are no kings at all to be found in this post which is makes this fortnight's Jingle Belles prompt, "We Three Kings" a bit mysterious, doesn't it? In fact, we are focusing on the *THREE* aspect. We'd like to see cards with three reindeer or three trees or three... well... something on them! This is one of those times when it'll be quicker to just show you what I made, so here ya go!

tags and snowflakes: doodlebug design; heart brad, antler brads and star enamel: eyelet outlet; patterned paper: lawn fawn, authentique and some tiny scraps of old bg behind the tags; border stickers: d-bug, american crafts, echo park; glossy white cardstock: the paper cut; adhesives: elmers brand gluetape, 3m foam tape, sewing machine

Ok, so, I started with THREE adorable Doodlebug tags. I intended to add THREE Eyelet Outlet Brads (one on each tag) but the obvious choice for the reindeer was a set of antlers which brought the total to four, thus scuppering that, lol; and technically the star is an enamel sticker. I settled for THREE border stickers behind the tags and finished off with THREE red snowflakes. I'd love to say I finished this at THREE pm... but... really it was more like 8:30. I do love this card, though!

Hop over to Jingle Belles and see Stephanie's card and start planning your own Trio-Centric masterpiece!

Thursday, January 30, 2020

Butterflies!

I will tell you a secret: I still love playing with stickers every bit as much as when I was ten years old! Luckily in the few years/decades which have elapsed since then, stickers have grown up... and there are some utterly droolworthy ones by Pepin which coordinate rather beautifully with my Eyelet Outlet Butterfly Brads. Coincidentally, both are available at The Ink Pad. A fact I'm discussing happily on The Ink Pad Blog today.

Wednesday, January 29, 2020

Seriously...

Here's a shocking true confession: I'm a bit of a coffee fiend. So when I saw this fun (and accurate!) sentiment on a t-shirt, I knew I had to pull out my Eyelet Outlet Coffee Brads and make a card.


I had originally planned to add some Donut Brads too, but in the end I settled for Coffee Beans on the card and Donut Washi Tape in the background. I printed the sentiment on a clear inkjet label using two free fonts: Bohemian Typewriter and Cafe Rojo.


And now who will join me in a cup of coffee?!

Sunday, January 26, 2020

It's Beginning to Look a Lot Like...

...InCoWriMo! What the heck is that, you ask? International Correspondence Writing Month, of course! A celebration of Snail Mail --the original social media, lol-- which takes place in February. The goal is to hand-write one note, letter, card or postcard each day from Feb 1st through the 29th. We're very fond of snail mail at The Ink Pad, so there's lots more about this paper-centric occasion on The Blog today!


Friday, January 24, 2020

Thanks, Santa!

We're still showing off the fun crafty things that Santa brought us at Jingle Belles and you still have time to jump in with us, which we hope you will!


Santa Gina found some absolutely AMAZING washi tape, including these two winter-themed varieties, so I built them into a a sort of custom patterned paper by repeating them at intervals on a piece of sheet music backed with plain cardstock to make it a little more robust. I paired it with some older Lawn Fawn paper I got at Paper Anthology, which features similar colors and also has cuuuute critters!

Be sure to check out Stephanie's beautiful card and then join the fun at Jingle Belles!

Thursday, January 23, 2020

Am I the Only One...

...who loves to make art featuring art supplies? Somehow I doubt it. Case in point, the super-bright, rainbowlicious card featuring Neat and Tangled's Paint Night Stamp Set I'm showing off on The Ink Pad Blog today! Here's a sneak peek:


Wednesday, January 22, 2020

So BEARY Cute!

There are new (adorable!) Polar Bear Brads at Eyelet Outlet and I just could not wait to make some fun and wintery Valentines!


I formatted the sentiment on my computer using two free fonts (Bohemian Typewriter and Manuscript) then opted to swap out the word "Together" for alphabet stickers in foam and fabric covered chipboard. I made the mostly-white card first, because I wanted to pair the Polars with our Snowflake Bling and Snowflake Tape. But then I wondered if the result was maybe a little too monochromatic??


So for my second card I decided to add in a pop of red in the form of some nice bold mats, plus a background of Tiny Heart Washi and a base of Checked Tape behind the Polar Bears. A few Snowflake Brads later I was calling it done!


I hope you'll be inspired to make some BEARY cute Valentines with your favorite Eyelet Outlet Brads and Tape! ♥

Tuesday, January 21, 2020

(The Good Kind of) Winter Blues

Have you already guessed the brief at Shopping Our Stash this fortnight? If you're thinking that "Winter Blues" means we want to see winter-themed projects and/or those which are predominantly blue, then YES you are correct. I went with "predominantly blue" though when I look at my finished card, it does feel a bit wintery in a weird way.

patterned paper: ciao bella; "beautiful" sticker: fancy pants; ruler sticker: julie nutting/photo play; navy cardstock: bazzill; embroidery floss: dmc; edge distressing tool: prima; adhesives: elmers brand tape runner; 3m foam tape; sewing machine with coats and clark heavy duty upholstery thread

I have been hoarding this gorgeous Ciao Bella "Broccato Estense" collection from Paper Anthology for about eighteen months. Which... as hoarding goes is not really all that long, but I've been trying to buy less and actually USE IT, so this was just the nudge I needed. In fact the only non-Ciao Bella products here are the ancient stickers and the navy blue cardstock. I added real hand -stitches over the pretend ones on that beautiful journal card, tons of distressing and lots of machine stitching and called it a day.

Hop over to SOS and see what amazing wintery and/or blue projects the crew have assembled especially to inspire YOU! ♥

Sunday, January 19, 2020

What's Better Together...

...than a Traveler's Notebook and Everyday Explorers Co. Stamps? Ok, sorry, it's a trick question, because as far as I can tell they are the perfect pair! Which makes it especially awesome that you can get both at The Ink Pad! You can also read all about exactly which things I used to customize the month of January (and this past week) on The Ink Pad Blog today!


Friday, January 17, 2020

Look What Santa Brought Me!

This fortnight at Jingle Belles we're giving you a chance to show off the fabulous new crafty gifts you acquired over the holidays. Or, if you were somehow (mistakenly, of course!) on the naughty list, you can swap in something you treated yourself to in the January sales; or even just an item you've had for a bit but not yet used. Sound like fun? Yeah, we thought so too!


My friend Gina knows how much I *LOVED* 2018's "Jingle" collection from Authentique, and that I'd be super-excited to revisit it; she found a complete set that even had the cardstock stickers and punch outs! So my plan for this week was basically to use as much of it as possible on one A7 card and I have achieved that goal, having used an oversized journal card, two pu nch-outs and some patterned paper; which I supplemented with red glitter and shimmer cardstocks, plus a few elderly white gems which suggested snow (sorta) to me!

Hop over to Jingle Belles to see Stephanie's card and link up your own masterpiece!

Thursday, January 16, 2020

He's a STAR-whal!

What do you get when you combine Lawn Fawn's adorable Winter Narwhal stamp, Eyelet Outlet's colorful Snow Boot brads and a blendy, splashy Distress Oxide background? Probably something a bit like this. Hop over to The Ink Pad Blog for the whole story!


Wednesday, January 15, 2020

Let's GO!

I'm taking you on a (metaphorical) road trip today, because my Eyelet Outlet Classic Car Brads are all revved up and ready to roll!


Possibly my all-time favorite type of "found" paper is old maps. They are great in collage, they are terrific as giftwrap (the big folding ones, especially!) and they are fantastic background for a masculine card! You don't need a particularly old map, even quite recent ones can be lovely and thanks to all the GPS-users today, you can often get an armful of maps at a garage sale for a dollar or so. The other vintage ingredients I used are a few playing cards from a game called "Touring"; an incomplete set of which I was given for Christmas from someone who knows how much I love old paper, lol. As soon as I saw the road trip motif I knew they would be awesome with the Classic Car Brads and I stand by that belief! Since they were the size of standard playing cards I needed to trim them down in order to fit a few of my favorite bits onto one A2 sized card. I fussycut the traffic light and added a Compass Brad to the center circle.


I matted my trimmed-down mini cards, as well as the map panel, on cardstock I adorned with strips of Glitter Silver Tape. I ran a strip of Tire Track Washi Tape around the center of the card and at the very end I added a few Star Brads. Et voila


I bet you have some outdated maps and maybe even a game or two which doesn't have all its parts. I also bet you could match them to some Eyelet Outlet Brads and Washi Tape to make a beautiful and unique card for someone special! ♥

Sunday, January 12, 2020

It's *Sticker* Sunday!

I've set the stencils aside just this once, because the last time I was at The Ink Pad I fell in love with these gorgeous Feather Stickers and I just couldn't wait to use them! 


And YES, for the record, I used the whole entire packet on ONE CARD! Which is the crafting equivalent of eating the entire pint of ice cream... but luckily much less fattening. These gorgeous stickers are diecut and translucent, so you can layer them on top of each other, and/or whatever pretty papers or collage you'd like to use them with.


In this case I framed a vintage bird illustration with a round frame I made of dictionary paper backed with cardstock to strengthen it. But this idea would also work perfectly with the vintage-style illustrations from a Pepin Paper Craft Book, or, for that matter, you could frame up a lovely family photo!  I cut the center out with the largest of my Lawn Fawn Circle Stackable Dies, then arranged the stickers around the edge, letting them overlap each other a bit. I distressed the edge of the dictionary paper panel, mounted it on some beautiful teal Idea-Ology Metallic Jewel Cardstock and then machine stitched around the edge to attach it to a dark blue 6" square card.


I think I need to head back to The Ink Pad for a few more stickers... BRB! :)

Friday, January 10, 2020

Wrappin' Up

We're still making holiday cards with leftover bits of giftwrap and tags at Jingle Belles and you're still invited to join the fun! Here's what I made this week:

giftwrap styles: red holographic snowflakes, white and silver snowflake tissue paper and snowman giftwrap which one of my presents was wrapped in; blue snowy patterned paper: authentique; snowflake gems: eyelet outlet; sentiment sticker: american crafts; adhesives: xyron, elmers brand tape runner, 3m foam tape, sewing machine

I've got three types of giftwrap on this card: the snowman was fussy-cut from one pattern; (with a second layer of scarf, hat and carrot nose... since one nice thing about giftwrap is the repeating pattern!) the red snowflakes are a second variety and the white snowflakes are tissue paper which I fused to a piece of Xyron-ed cardstock so it would be sturdy enough to diecut into snowy hills. 

As a matter of fact I made two (very similar) cards this week, because after I finished the first one, I sort of fell violently out of love with the red snowflake sky. And since it is giftwrap, and I did have more of everything, I let myself have a do-over in which I swapped in some patterned paper with a softer, bluer, snowy sky. 


Stephanie also has a lovely card to show you AND you might like to check out the original post over at Jingle Belles because I thiiiiiink there just might've been a fun little prize this fortnight...

Thursday, January 9, 2020

Rats... Now I Want CAKE!

I'm fairly smitten by a new, just slightly snarky, line of Mary Engelbreit cling stamps called Mary Engeldark. This set is called Have My Cake and Eat It Too and it's the perfect star for my shaker card, which is on The Ink Pad Blog today:


Wednesday, January 8, 2020

Bring On the Bling!

It's no secret that I looooove Eyelet Outlet Bling... the fancier the better! But this is the first time I've used it to create a compound mandala shape. Pretty sure it will not be the last, however.


I started with an XL (2") Snowflake in the center of my 6" square pan pastel gelprint. At the end of each "arm" of the snowflake, I added one Heart Jewel Bling, facing outwards. Then I placed a smaller 1.5" Snowflake between each pair of hearts, to be like a second round of arms. Finally I added a clear Teardrop Gem at the top of each heart. Et voila!


Remember when I said I was pretty sure you'll see this idea revisited? Well I take it back. Because I'm no longer pretty sure... I'm positive! ♥

Tuesday, January 7, 2020

Rollin' With My Gnomies

It's the first challenge of 2020 at Shopping Our Stash so we'd like to welcome you, "Gnome Sweet Gnome" for which... (you've guessed already, right?) ...we'd like to see projects which feature GNOMES o'course!


I really (really!) thought I had a gnome stamp. In fact, I would've sworn... but if I ever did have one, it is no longer on this plane of existence. So I had to drop back and punt. Luckily I found this awesome gnome tug-of-war illustration in a falling apart old childrens' book and I was able to quickly make it into a birthday card with only (ancient) letter stickers, some (oldish) lined patterned paper, scraps of cardstock and teeny tiny puffy heart stickers. Go, me!

Hop on over to SOS and see what the gang have come back from holiday break to inspire you with! ♥ 

Sunday, January 5, 2020

Hexed (& Possibly Vexed)

This week I had a blast doodling all over a rainbow ombre background I made with Michelle Ward's Large Hex Pattern Stencil and VersaFine Clair Inks but... what do you do with a card panel that is 8x10"?! The answer is on The Ink Pad Blog today! ;)


Saturday, January 4, 2020

January/February Classes at Paper Anthology

Time to show off the first new classes of the year at Paper Anthology in Kenvil, NJ. If you're in the Morris County area, I'd love for you to join me! All the details are on the Paper Anthology Class Page.

Shabby Chic Envelope Journal

We'll construct the easiest journal EVER (hint: it's made out of A2 envelopes but works with any size; you will LOVE this trick!) and then add just enough shabby chic detail to make a lovely gift for someone special, maybe YOU?! There will still be room to decorate and customize by adding photos, ephemera, text or... whatever! This would be perfect for celebrating a special birthday or anniversary; documenting a dream vacation; remembering baby's first year or recording favorite quotes, dreams or ideas. There will be a choice of Blue Fern Studio papers (mostly neutral colored, with botanical accents) to customize each book, so it will be possible to "lean" toward more masculine or more feminine in style.


Letter Better
(limit 6 per class, so each student will get some one-on-one time)

This workshop-style class is open to students of all levels, whether you've never lettered before OR just want to brush up your skills. You'll get to try several types of pen on various papers and leave with a better idea of what specific skills to practice in ways that are actually FUN!  In addition to demonstrating some popular lettering styles and sharing her favorite tips and tricks, Lauren will work individually with each student to address specific challenges or areas of interest. All supplies will be provided, however students who own lettering pens they'd like to practice with are welcome to bring them. 

Thursday, January 2, 2020

New Year, New Journal

One of the joys of the new year for any stationery junkie is, of course, the pleasure of starting a Brand. New. Journal. This is the first year I'll be using a Traveler's Notebook, but as soon as I saw them at The Ink Pad I knew I was already hooked. The most difficult part may actually be deciding which variety you want!


I chose the Weekly Diary for working in 2020 and the Regular Size Refillable Binder since I'll be able to use it for a few years. But also... that plain kraft cover just screamed for me to customize it with my own vintage paper collage goodness. So I did.


Since I was having so much fun, I decided to go ahead and wrap some of the vintage paper goodness right around to the inside front cover. Since the Weekly is divided into two six-month segments (sold together) I customized the inner cover of my January-May volume, which seemed like a really good place for one of the exclusive Traveler's 2020 Stickers I got in October.


Finally, I was ready to start filling in my first few days with some very cool MT Clip Tape, assorted tiny stickers, a little bit of Karin Marker lettering and one of my favorite stamps of the moment: Lawn Fawn's Winter Narwhal. I tend to use my journal as a cross between an art journal and a scrapbook, so I generally record and save things I've already done, rather than add in future events like a regular calendar.


My other favorite new product right now are these beautiful Vintage Black and White Flower Stickers which are printed on semi-sheer vellum. I layered them right over my other collage elements and I love the result. Finally, I customized the vintage library card I'm using to designate the book for 2020. Next year, instead of re-doing the entire cover, I will just make a new card or tag to tuck into the pocket for 2021!


But that's an entire year away, so I think for now I will concentrate on documenting the adventures my Traveler's Notebook and I will have in 2020!

Wednesday, January 1, 2020

New Year's Toast!

May I --and the rest of the Eyelet Outlet gang-- be amongst the first to wish you a very happy, healthy and creative 2020!


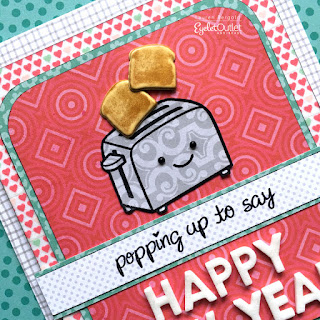
My first idea for a classic New Year's card was of course to use the Champagne Flutes from the Wedding Brads set, but as the words, "New Year's Toast" were circulating through my mind, I kept thinking about the Toast Brads from the Breakfast set which of course I could pair with my Lawn Fawn "Love and Breakfast" stamps, so that's what I decided to make instead. I used the red, aqua and pink of Tiny Heart Washi as my color inspiration, and lined up strips of that tape neatly on plain white cardstock to be my second-to-bottom layer of this bright and happy card.


I hope the New Year is treating you well so far! ♥

It's January First...

...and thus time to get going on those Xmas cards!!! Which sounds like a silly thing to say, unless you've ever made 50 or more holiday cards at the beginning (or middle?) of December. In which case, you may well have *VOWED* to never do it again and joined us at Jingle Belles to make one stress-free card per week from January through November. Thus saving the day and taking December back!

So without further ado, let's kick off our TENTH festive Jingle Belles season with a prompt we call, "No Time Like the Presents" for which we'd like to see cards which feature bits of gift wrap or tags that were too cool to throw away!

Here's my card:


My friend Barb sent me a very pretty present wrapped in beautiful matte giftwrap which had these snow-dusted evergreens on it, and the minute I saw it, I started figuring out how to get the paper off without tearing or wrinkling it! There was a pretty big crease at the left edge, which I decided to cover with collagey bits. These include a most serendipitous scrap from a French language children's book which says "The Christmas Tree"; some beautifully patina-ed sheet music and some of the amazing 1957 Christmas Seals my mom found at a thrift shop. The red glitter mat is another piece of careful unwrapping (by my niece Maddie); because knowing me pretty well, most of my family hold up their gifts before unwrapping and ask if I want the paper saved, lol!

Hop on over to Jingle Belles to see Stephanie's first inspiring card of 2020 and start planning what you will make!